 Birch Bay
 Siding Built for the California Creek Waterfront
California Creek sits close enough to the water that homes here take a different kind of beating than siding a few miles inland. Salt-laden air off the bay works into seams and fastener heads year-round. Wind-driven rain doesn't just fall straight down — it hits walls sideways, especially on west- and south-facing exposures, and finds every gap a rushed installation left behind. Then there's moss season, which in this part of Whatcom County isn't really a season at all — it's most of the year. Shaded walls, tree cover, and constant moisture give moss and algae exactly what they need to take hold on anything less than a dense, factory-sealed surface.
None of that means siding here is doomed to fail. It means the installation has to account for those conditions from the first course to the last piece of trim. That's the whole job of this page: what a California Creek home actually needs from a siding installation, what correct work looks like, and how we approach it.
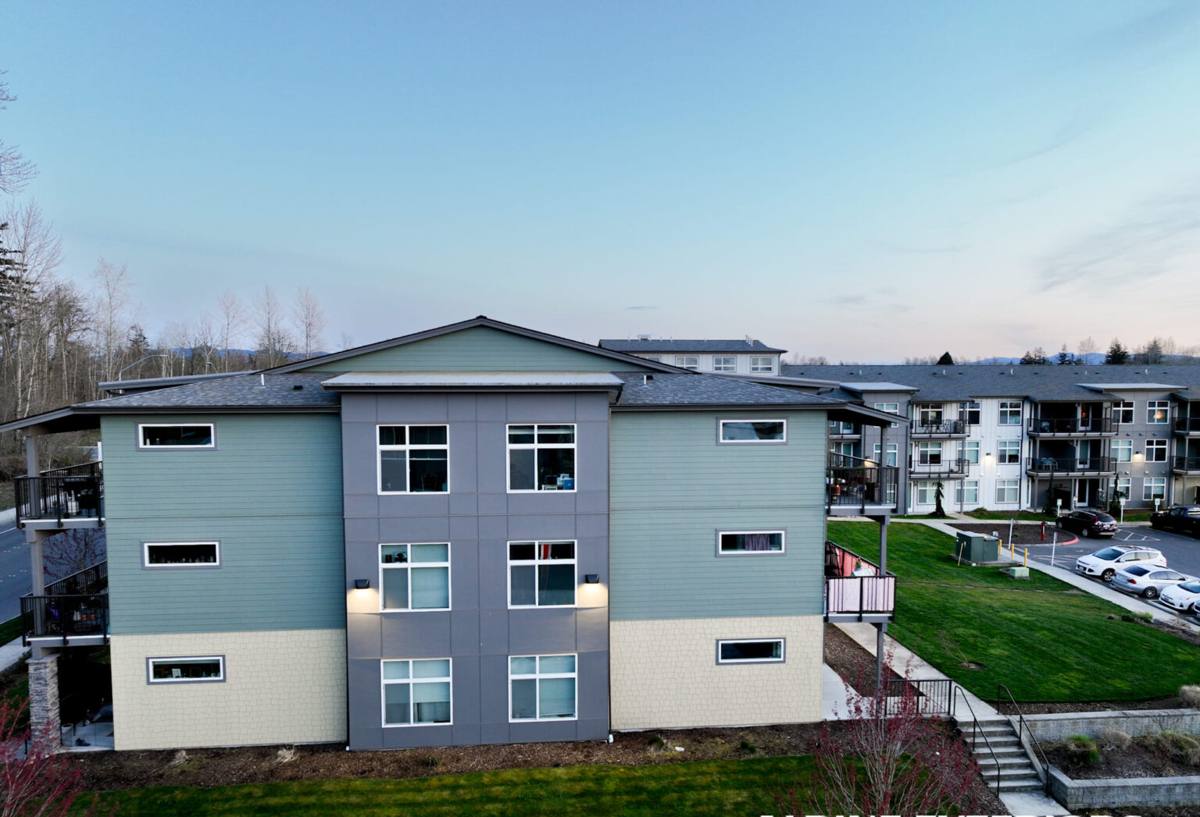
What Salt Air, Rain, and Moss Actually Do to Siding
Salt Air
Airborne salt is corrosive to metal and hard on any finish that isn't dense or well-sealed. Fasteners, flashing, and trim accessories all need to be rated for coastal exposure, and the siding's factory finish needs to resist chalking and fading in a salt environment — not just look good on day one.
Driving Rain
Wind-driven rain pushes water into places gravity alone never would — up under laps, sideways through unsealed joints, behind trim that wasn't flashed correctly. A siding installation that only manages water moving straight down will eventually let water in. The water-resistive barrier, flashing details, and lap spacing all have to be built for wind-driven exposure, not just rainfall totals.
Moss and Algae
Moss doesn't damage siding by growing on top of it — the damage comes from moisture retention underneath it. Once moss and algae establish themselves on a porous or poorly sealed surface, they hold moisture against the substrate, and that's when rot, delamination, and paint failure start. A siding material with a dense, factory-cured finish resists that growth far longer than a field-painted or absorbent surface does.
What a Correct Siding Installation Actually Involves
A siding installation is really a water management system with a finished surface on top of it. Get the water management wrong and no amount of trim work or paint quality will save the wall underneath. On a home in this area, we treat every one of these steps as non-negotiable:
- Full inspection and removal of existing siding down to the sheathing, so hidden rot, soft spots, or prior moisture damage get caught before they're covered up again
- A continuous, correctly lapped water-resistive barrier behind the siding — no gaps, no shortcuts around windows and penetrations
- Properly flashed windows, doors, and any wall penetration, with flashing that directs water out and down, not into the wall cavity
- Correct nailing pattern and fastener depth — over-driven or under-driven fasteners are one of the most common causes of premature siding failure
- Manufacturer-specified clearances at the foundation, roofline, and any horizontal trim, so water has somewhere to go instead of wicking into the bottom edge of the siding
- Caulking and sealant only where the manufacturer calls for it — sealing the wrong joints traps moisture instead of shedding it
Skip any one of these and the siding might still look fine for a year or two. The failures that show up later — soft trim, streaking, panels that have swollen or separated — almost always trace back to one of these steps being rushed or skipped during installation, not to the material itself.
Why We Install Only James Hardie Fiber Cement
We don't install vinyl, LP SmartSide, Cemplank, Allura, primed spruce, or cedar. That's a deliberate standard, not a limitation in what we're capable of installing. Given what this climate does to a home's exterior, we'd rather install one product correctly and stand behind it than offer a menu of options with different long-term risk profiles.
James Hardie fiber cement is non-combustible, dimensionally stable in wet climates, and finished at the factory with ColorPlus Technology rather than field-painted — which matters directly for the salt air and moss concerns above, since a factory-cured finish resists fading and biological growth far better than a coat of paint applied on site. Hardie also makes climate-engineered HZ product lines specifically for wet, marine-influenced regions like ours, and backs the material with a strong transferable warranty. None of that replaces correct installation — but it gives us a product built for this exact environment, backed by a manufacturer that engineers for it.
Our Installation Process
| Stage | What Happens |
|---|---|
| On-site assessment | We walk the exterior, check for existing moisture damage, and note exposure (wind direction, shade, proximity to water) that affects material and detailing choices |
| Removal | Old siding comes off down to the sheathing so we can inspect and repair what's underneath before anything new goes up |
| Sheathing and barrier repair | Any soft or damaged sheathing is replaced, and a continuous water-resistive barrier is installed and lapped correctly |
| Flashing and trim prep | Windows, doors, and penetrations get flashed to direct water out of the wall assembly, not into it |
| Hardie installation | Panels or lap siding installed to manufacturer fastening and clearance specifications, factory-finished so no field painting is required |
| Final trim and caulking | Trim, corners, and sealant applied only where specified — and a final walk-through with the homeowner |
Signs a California Creek Home May Need Siding Replaced
Some of these are obvious. Others take a closer look, especially on shaded or water-facing walls where moisture problems tend to start first.
- Streaking, dark staining, or moss and algae buildup that keeps returning shortly after cleaning
- Soft or spongy spots when you press on the siding, especially near the bottom edge or around trim
- Visible warping, buckling, or panels that have separated from the wall
- Paint that's peeling or bubbling on painted wood or composite siding — often a sign moisture is trapped underneath
- Rising energy bills that could point to a compromised water barrier or insulation getting wet behind the siding
- Visible rot or damage around window and door trim, where flashing failures usually show up first
Any one of these is worth a closer look before it turns into a sheathing or framing repair, which costs considerably more than a siding replacement caught early.
What Affects the Cost of a Siding Installation Here
| Factor | Why It Matters |
|---|---|
| Home size and number of stories | More surface area and taller walls mean more material and more time, plus added scaffolding or lift access on two-story sections |
| Existing siding removal | Tear-off and disposal of old material adds labor, especially if multiple layers were installed over the years |
| Sheathing condition | Hidden rot or water damage found during removal has to be repaired before new siding goes on — this is common near the waterline in this area |
| Trim and detail complexity | Homes with lots of window trim, corner boards, or architectural detail take more time to flash and finish correctly |
| Siding profile chosen | Lap siding, panel siding, and shingle-style Hardie products differ in material cost and installation time |
| Access and site conditions | Tree cover, tight lot lines, or limited equipment access can add time to a job in a wooded, waterfront neighborhood like this one |
Why It Matters to Hire a Crew That Already Works in California Creek
A crew that's worked around Birch Bay and the surrounding Whatcom County waterfront knows what wind-driven rain and salt exposure actually do to a wall assembly, because they've opened up enough of them to see it firsthand. That experience shows up in small decisions — how tight to run clearances at grade, which walls need extra attention to flashing, how to sequence a job around this area's weather — that a crew unfamiliar with the local conditions might not think twice about.
It also means realistic expectations about timing. Weather windows here can be narrow, especially outside the summer months, and a local crew plans around that instead of leaving a wall partially open when a storm rolls in off the water.
After Installation: Keeping It Performing
James Hardie siding, correctly installed, is low-maintenance — but "low-maintenance" isn't "no-maintenance," especially this close to the water.
- Rinse siding periodically to keep salt residue and organic buildup from accumulating, particularly on shaded or water-facing walls
- Keep gutters clear so overflow doesn't run down the face of the siding
- Trim back vegetation that's shading walls and keeping them damp longer than they need to be
- Walk the exterior once a year and check caulking at trim joints and penetrations for cracking or separation
- Address any soft trim or staining promptly rather than waiting for it to spread
If you're weighing a siding replacement or just want a straight answer on whether your current siding is holding up the way it should, we're happy to take a look. The estimate is free, there's no pressure, and you'll get a clear explanation of what we see and what it would take to fix it.