 Birch Bay
 Birch Bay Village is one of the older residential pockets within Birch Bay, and the housing stock reflects it — smaller cottages and cabins built decades ago sit alongside newer construction, and a fair number of the older homes started as seasonal places before being converted for year-round living. Whatever the age or history of the house, the siding on it has the same job: keeping salt-laden marine air, wind-driven rain, and a long moss season from working their way into the wall behind it. That's a harder job here than it is a few miles inland, and it's the reason a straightforward siding replacement in this neighborhood deserves more than a like-for-like swap.
Replacement is different work from a patch or a recoat. The old cladding comes off entirely, and that's the moment a house's real condition — the sheathing, the flashing, the weather barrier underneath — finally becomes visible. We treat that moment as the most important part of the job, not a formality on the way to hanging new panels.
Why Full Replacement Looks Different in This Climate
Birch Bay Village sits close enough to the water that homes here take on more salt exposure than properties set back further inland in Whatcom County. Salt-laden air accelerates corrosion on fasteners and metal trim, and it breaks down lower-grade finishes faster than a drier climate would. On top of that, storms push rain sideways into wall assemblies rather than letting gravity do the work, which means water tests every seam, joint, and penetration in a way a calmer location never would. Add in the shade and dampness common on this stretch of coastline, and you get a moss and mildew season that can run most of the year on north-facing walls — a slow, steady source of moisture against the siding surface itself.
None of that is unique to Birch Bay Village specifically, but it's more pronounced here than in a lot of the surrounding area, and it's exactly why a full replacement needs to address more than just the visible cladding.
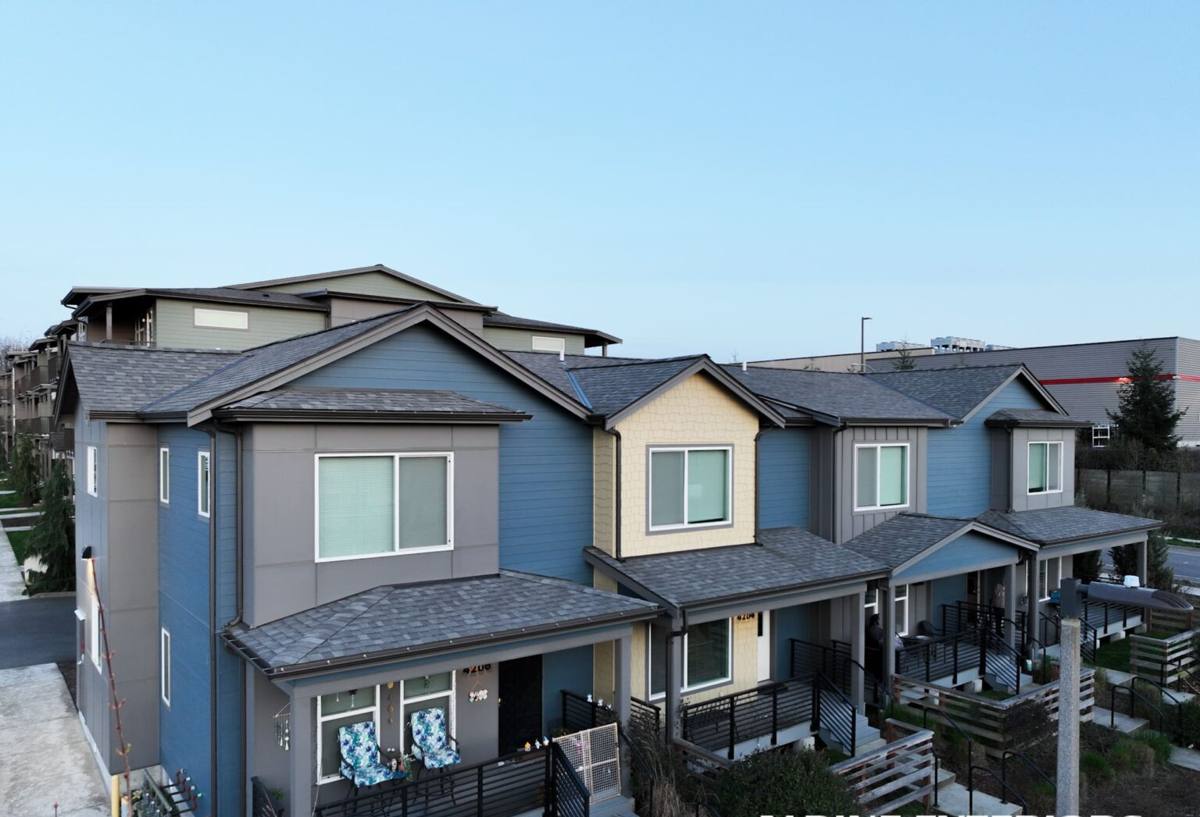
Signs It's Time to Replace, Not Patch
Repair makes sense when the damage is isolated and the material underneath is still sound. Replacement makes sense once the problems are spread across the wall or the underlying assembly is compromised. A few signs point toward replacement rather than another round of patching:
- Soft, spongy, or crumbling spots when you press on the siding, especially near the bottom courses or under windows
- Persistent moss or dark staining that keeps returning within a season or two of cleaning
- Paint or finish that's peeling, bubbling, or chalking across multiple wall sections rather than one spot
- Visible warping, cupping, or gaps opening up at seams and butt joints
- Repeated interior signs — soft drywall, musty smell, or staining near exterior walls — that point to moisture getting past the cladding
- A pattern of repair calls on the same wall over the last several years without the problem actually going away
If only one or two of these show up in a small area, a repair may still be the right call. If several are present, or if they're spread across more than one wall, the underlying assembly has likely been compromised long enough that a patch would just be delaying the real fix.
What's Often Found Once the Old Siding Comes Off
A lot of the older homes in Birch Bay Village were built or added onto before current weather-barrier and flashing standards were common practice, and many started life as smaller seasonal cabins that were later expanded or converted to full-time residences. That history matters once the old siding comes off. It's common to find sheathing that's absorbed moisture over years of small leaks nobody noticed from the outside, older building paper that's degraded well past its useful life, or flashing at additions and window openings that was never properly tied into the original wall assembly. None of that is a reflection on the homeowner — it's simply what decades of exposure to this climate do to materials and details that were standard practice at the time but wouldn't meet today's expectations.
This is also where mismatched work from a prior addition or remodel tends to surface — a newer section of wall sided over the original without matching the flashing plan underneath it, or a window swapped out at some point without integrating the new flashing into the surrounding siding. Full replacement is the point where all of that gets reconciled into one consistent, correctly detailed wall system instead of staying a patchwork of decisions made at different times by different people.
What a Correct Siding Replacement Involves
Tear-Off and Sheathing Inspection
The old siding comes off in full, and the sheathing underneath gets inspected before anything new goes up. Soft or delaminated sheathing gets cut out and replaced rather than covered over, because fastening new siding to compromised sheathing just guarantees a repeat problem a few years down the line. This is also the point where we can see and correct any framing or flashing issues that were hidden by the old cladding.
Weather-Resistive Barrier and Drainage Plane
A correctly installed weather-resistive barrier behind the siding is what actually stops incidental moisture that gets past the cladding from reaching the sheathing. In a climate with this much wind-driven rain, we also build in a drainage plane — a gap that lets any moisture that does get behind the siding drain and dry out instead of sitting against the wall. That detail matters more here than it would in a drier, calmer location, because the siding surface itself is going to see sustained wetting on a regular basis, not just occasional rain.
Flashing at Windows, Doors, and Trim
Flashing is where most real-world siding failures actually start, not the field of the wall. Every window, door, and trim transition needs flashing that's lapped correctly — upper courses over lower ones — so water sheds outward instead of finding its way behind the barrier. On a replacement, this is the step that gets rebuilt properly rather than patched around whatever was there before, especially at additions or window openings that didn't get full attention the first time around.
Installing James Hardie to Spec
Fiber cement only performs the way it's designed to when it's installed to the manufacturer's published specifications — correct fastener type and spacing, proper clearance from grade and roof lines, and factory-mitered or properly caulked joints. We install James Hardie's HZ5 product line, engineered for regions with heavy moisture exposure and freeze-thaw cycling, which fits this part of Whatcom County. A quality product installed loosely will still develop problems in a climate like this one; the installation is what makes the material perform.
Why We Replace With James Hardie Fiber Cement Only
We used to install a broader range of siding products. We don't anymore, and that change came directly from what we kept finding on tear-offs in this kind of climate — sustained moisture, salt exposure, and heavy moss — not from a supplier relationship. We won't install LP SmartSide, vinyl siding, Cemplank, Allura, primed spruce, or cedar on a replacement job. Each has a legitimate place in the market and homeowners who are satisfied with them in other settings, but on a full tear-off and reside, we've made the professional call that we'd rather stand fully behind one system than offer a cheaper option that shifts long-term maintenance risk back onto the homeowner. Fiber cement's non-combustible core, factory-applied ColorPlus finish, and dimensional stability under repeated wetting are the reasons it's what goes back on the wall once the old siding comes off.
| Material | How It Handles a Full Tear-Off Environment | Longevity Once Replaced |
|---|---|---|
| James Hardie fiber cement | Dimensionally stable; doesn't swell or cup with repeated wetting | 30+ years with correct installation |
| Vinyl siding | Can distort with heat and doesn't add real structure to the wall assembly | Variable, often shorter in exposed coastal spots |
| LP SmartSide / engineered wood | Wood-based core is sensitive at cut edges and joints if sealing lapses | Depends heavily on ongoing maintenance |
| Cedar / primed wood | Absorbs and releases moisture readily; needs consistent refinishing | Shorter without regular upkeep |
Our Siding Replacement Process
- On-site assessment — we walk the exterior, note problem areas, and give an honest read on whether repair or full replacement is the right call
- Written scope and timeline — a clear plan before anything is removed, including what happens if hidden sheathing or framing damage turns up mid-project
- Tear-off — old siding and, where needed, degraded building paper come off completely
- Sheathing repair — any soft or damaged sheathing found underneath gets replaced, not covered over
- Weather barrier and drainage plane — new house wrap or building paper installed with a proper drainage gap behind the new siding
- Flashing rebuild — windows, doors, and trim transitions reflashed to shed water outward at every course
- James Hardie installation — panels installed to manufacturer spec, with correct fasteners, clearances, and joint treatment
- Final walkthrough — we go over the finished wall system with you before calling the job done
What Drives Cost on a Birch Bay Village Replacement
A handful of factors tend to move the price on a full siding replacement more than anything else: how much of the underlying sheathing needs repair or replacement once the old cladding comes off, the total square footage and the number of stories, how much trim and how many window and door openings need flashing work, and whether the home has architectural details — multiple gables, dormers, or additions with mismatched wall planes — that add cutting and detail time. Homes in Birch Bay Village that started as smaller cabins and were later expanded sometimes carry more of that complexity than a home built in one phase, simply because there are more transitions between original and added construction to detail correctly. We won't give a number without seeing the house, but we'll walk through which of these factors apply to your specific project before you commit to anything.
Why a Local Birch Bay Village Crew Matters
A crew that already works this neighborhood knows what tends to be hiding behind older siding here before the first piece even comes off — where moisture typically collects, which additions usually need extra flashing attention, and how much salt and wind exposure a given wall has actually seen based on its orientation to the water. That familiarity shows up in the details that decide whether a replacement lasts one wet season or several decades: how a drainage plane gets detailed, which fastener grade gets used, where extra flashing lap gets added even when it isn't strictly required.
- Ask what they typically find once older Birch Bay Village siding comes off, and how they handle it if sheathing repair is needed
- Confirm current Washington contractor licensing and active liability insurance
- Ask how they detail the drainage plane and flashing for wind-driven rain specifically, not a generic answer
- Get a written scope of work, including how unforeseen sheathing damage would be handled and priced, before signing anything
- Ask what warranty covers the installation labor versus what James Hardie covers on the product itself
If your Birch Bay Village home's siding is showing its age, or you're not sure whether repair or full replacement makes sense, we're happy to walk the exterior with you and give an honest read on what it needs. Reach out below for a free, no-pressure estimate.